Home
Home  Navigation


Update Your Overwatch 2 Username: A Comprehensive Guide
Your Overwatch 2 in-game name is more than just a nickname; it's your online identity. This guide details how to change your BattleTag (PC and cross-platform players) or console gamertag (Xbox and PlayStation with cross-play disabled).
Can I Change My Name in Overwatch 2?
Yes! The process varies slightly depending on your platform and cross-play settings.
How to Change Your Name in Overwatch 2
Your in-game name is tied to your Battle.net account (BattleTag).
Key Considerations:
- Free Name Change: You get one free BattleTag change.
- Paid Name Changes: Subsequent changes incur a fee (approximately $10 USD; check your region's price in the Battle.net shop).
- Cross-Play: If cross-play is enabled on console, use the PC method. If disabled, use the console's settings.
Changing Your Name on PC (or Console with Cross-Play Enabled)
- Go to the official Battle.net website and log in.
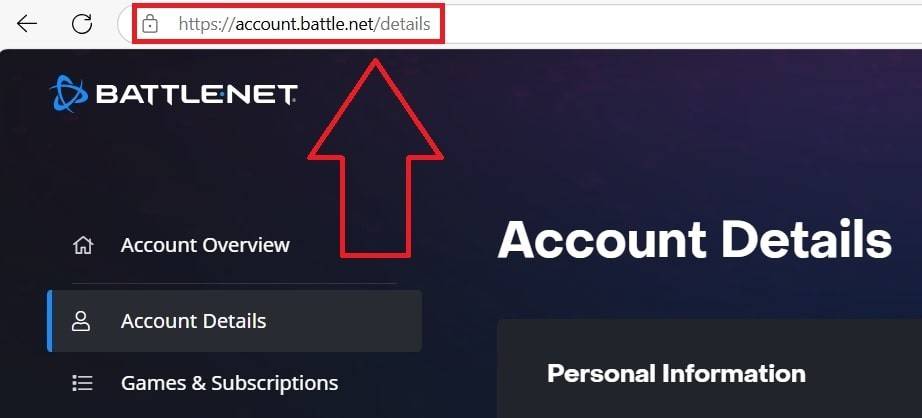
- Click your current username (top right).

- Select "Account Settings," then locate your BattleTag.
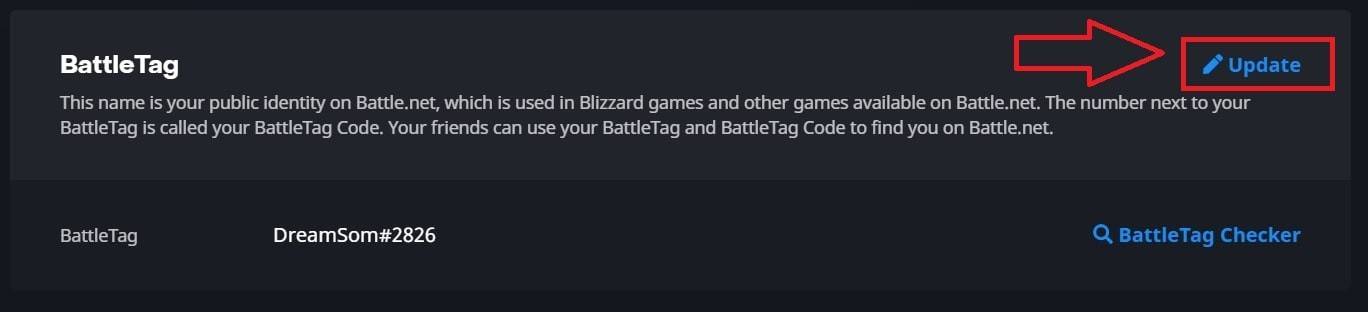
- Click the blue "Update" (pencil icon).
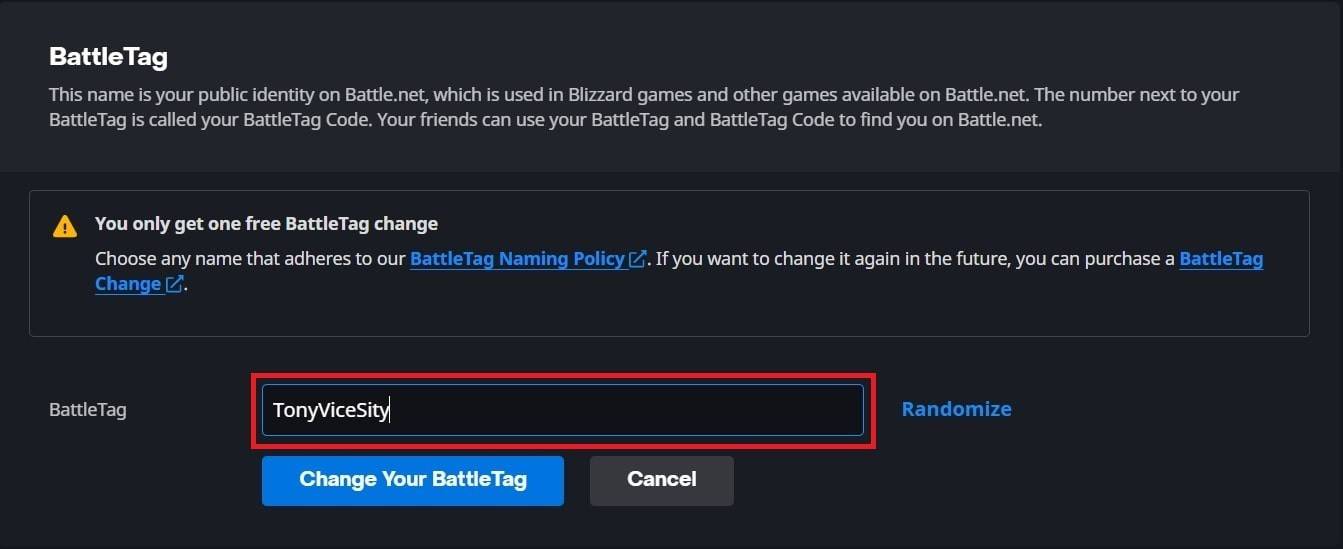
- Enter your new name (following BattleTag naming rules).
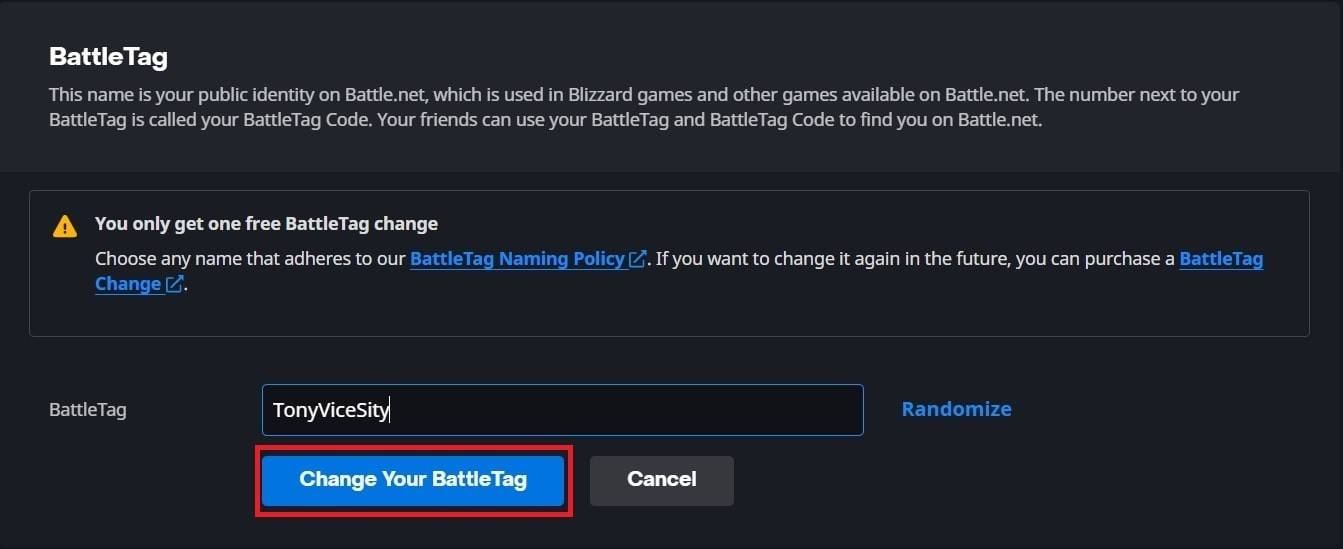
- Click "Change Your BattleTag."
Note: Changes may take up to 24 hours to fully propagate.
Changing Your Name on Xbox (Cross-Play Disabled)
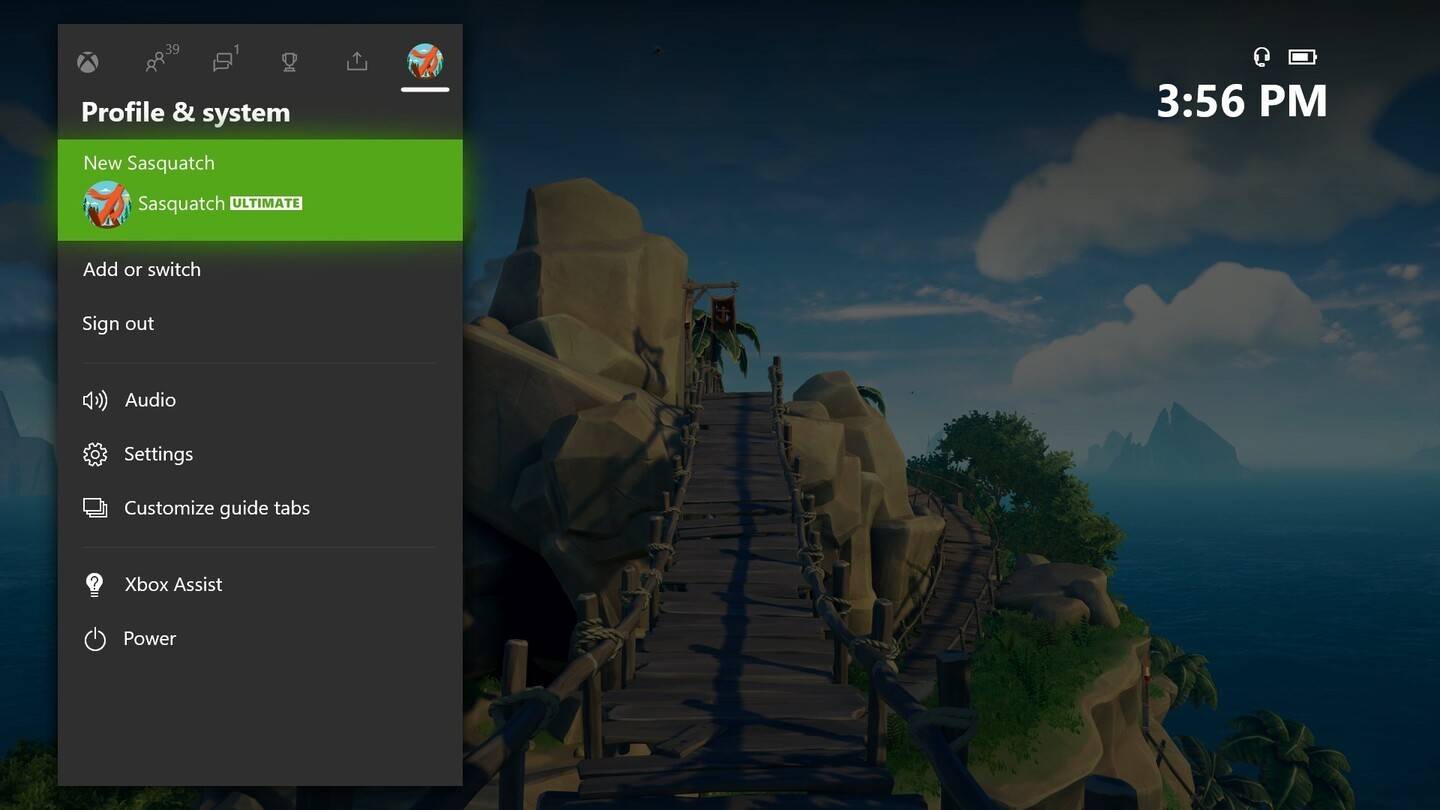
- Press the Xbox button.
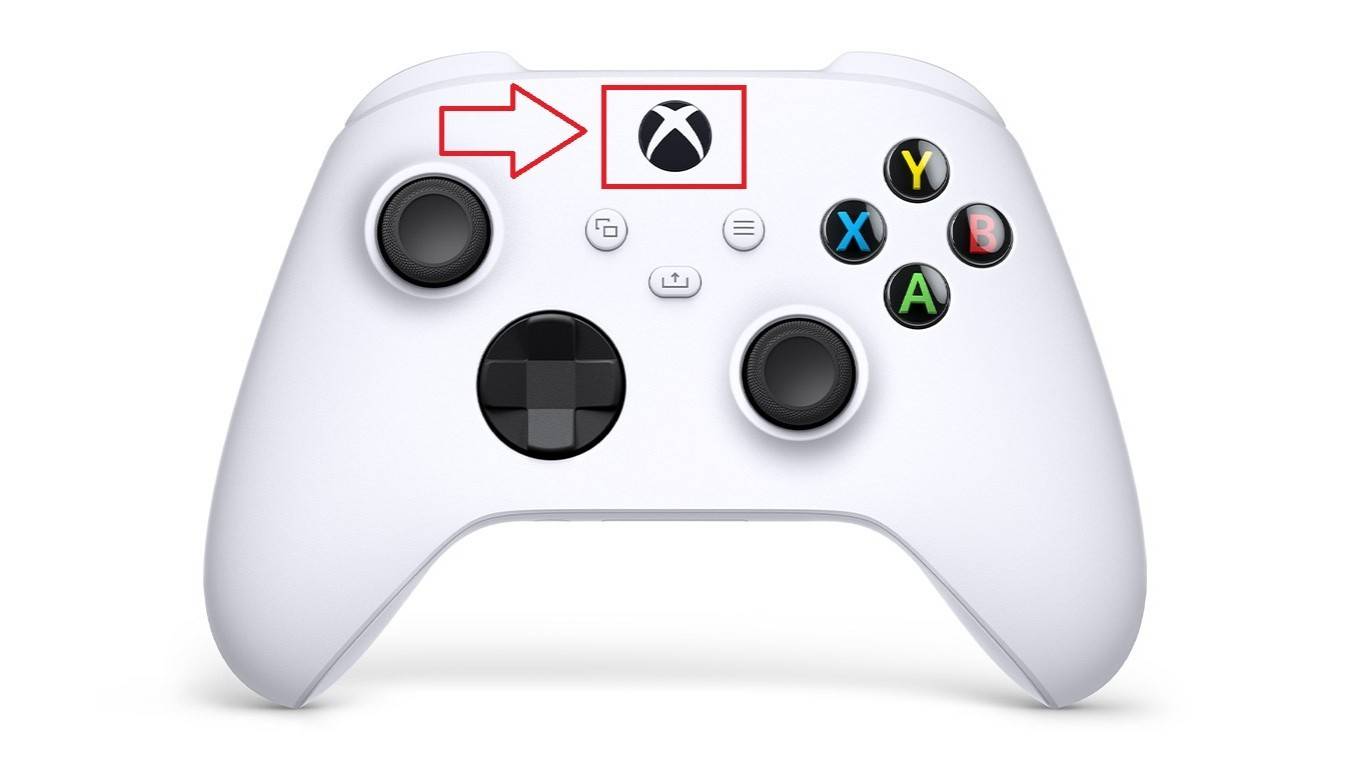
- Go to "Profile & System," then your Xbox profile.
- Select "My Profile," then "Customize Profile."
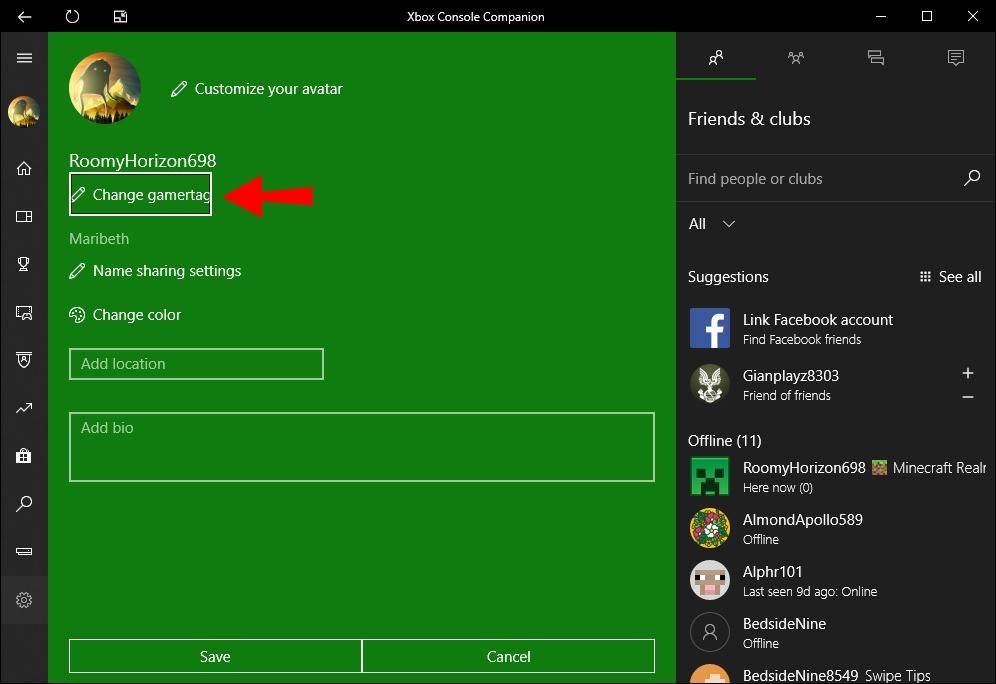
- Click your Gamertag, enter the new name, and confirm.
Note: This only affects other Xbox players with cross-play disabled. Others will see your BattleTag.
Changing Your Name on PlayStation (Cross-Play Disabled)
- Go to "Settings," then "Users and Accounts."
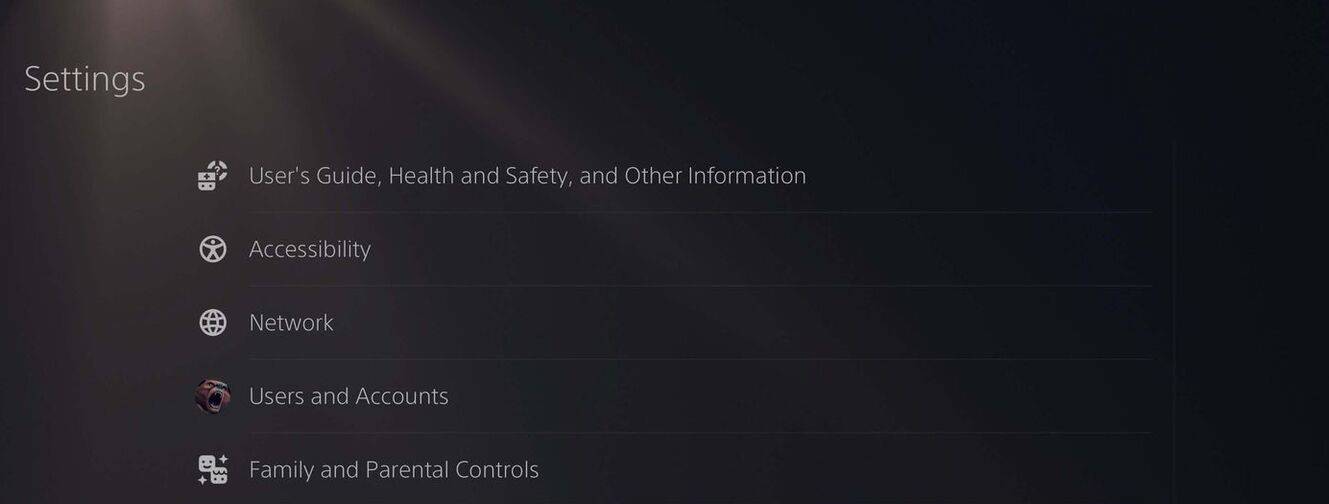
- Select "Accounts," then "Profile."
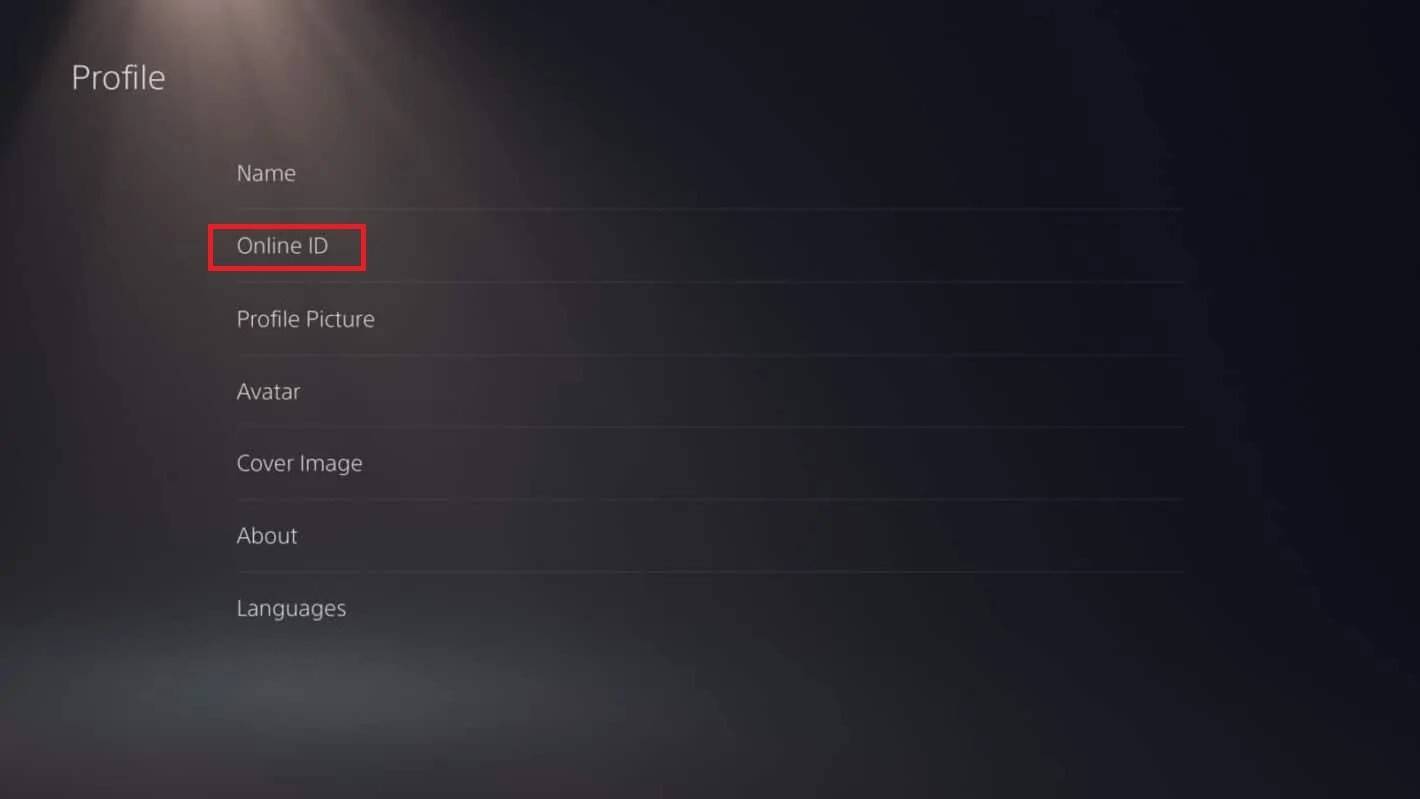
- Find "Online ID" and click "Change Online ID."
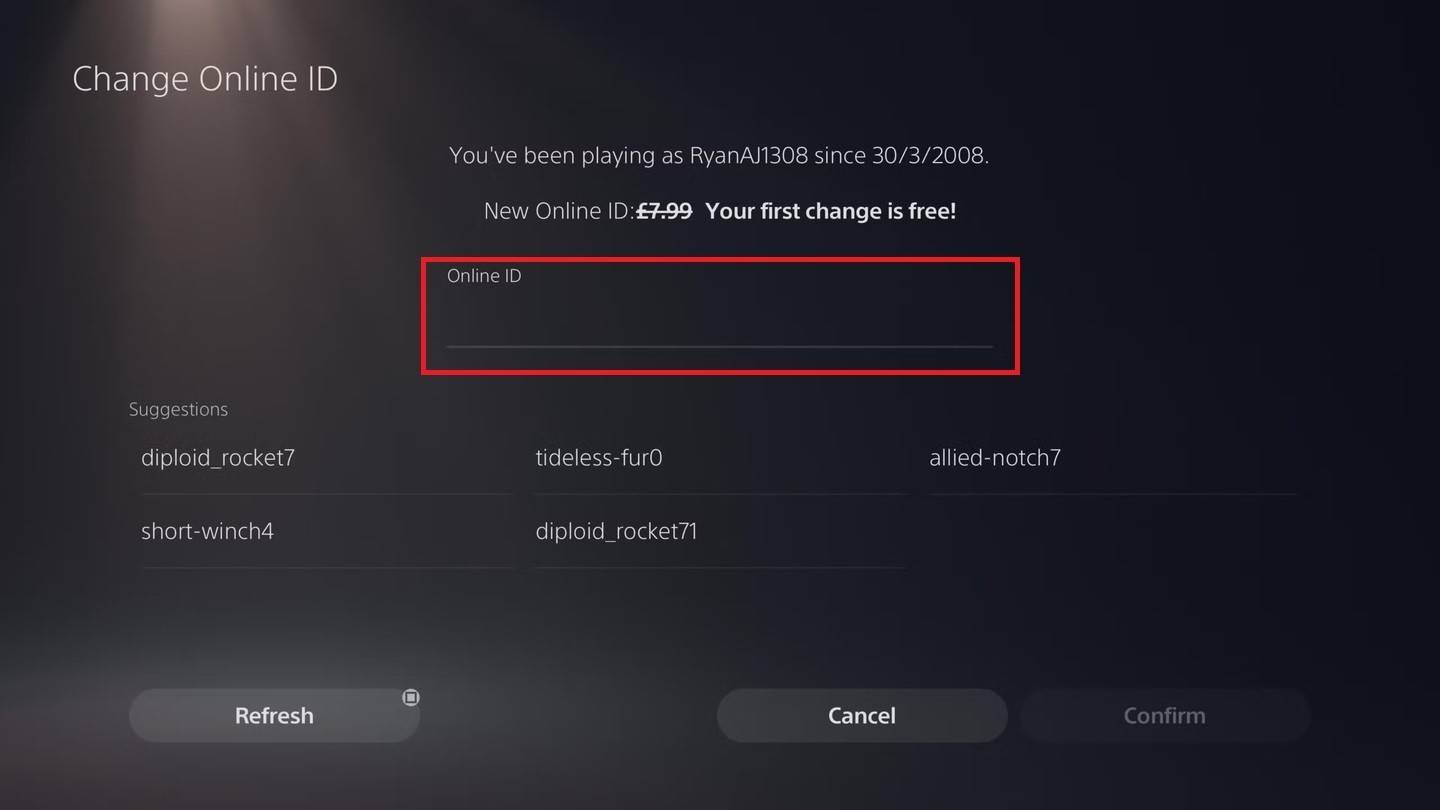
- Enter your new name and confirm.
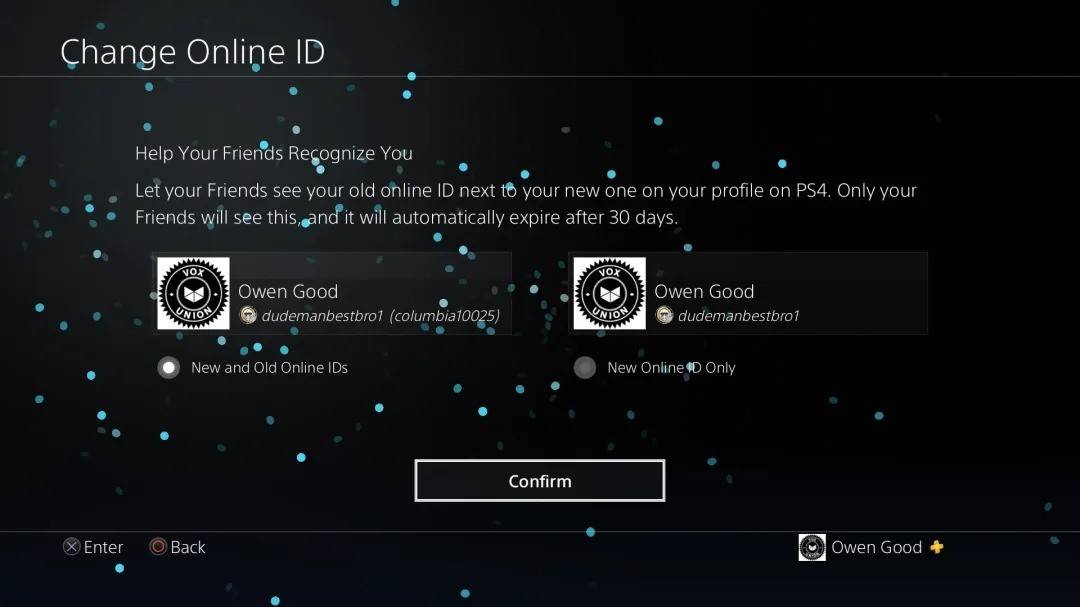
Note: This only affects other PlayStation players with cross-play disabled. Others will see your BattleTag.
Final Recommendations
Choose the method based on your platform and cross-play status. Remember the free name change limit and any associated fees for subsequent changes. Ensure your Battle.net wallet has sufficient funds if needed.
 Latest Articles


 Latest Games