Home
Home  Navigation


In Roblox's *Pressure*, mastering the art of survival against various monsters is key to conquering each room. While some monsters require similar strategies, others demand specific tactics to ensure you clear each run flawlessly. Below is a comprehensive guide on **all monsters in *Pressure* and how to survive them**.
How to Survive All Monsters in Pressure
Here, you'll discover **how to beat all monsters in *Pressure***. Some encounters are random, others are Node-specific with designated paths, and some appear in particular areas, like The DiVine in Oxygen Gardens. I'll walk you through the exact methods to handle each monster and the cues to watch for so you can hide effectively. Be cautious of **Cleithrophobia**, which can force you out of hiding if you stay concealed too long, so don't hide prematurely. Instead, pay attention to the specific signs for each monster listed below.
Pandemonium
 Image by The Escapist
When you notice lights flickering, Pandemonium might be on its way. Don't rush to a locker due to Cleithrophobia; instead, stand beside one and wait for the roar audio cue. Pandemonium will instantly kill any player in its sightline who isn't hidden. Once it nears your locker, you'll be engaged in a mini-game where you must keep the cursor centered as the monster shakes the locker. Survive this, and you'll outlast Pandemonium.
Good People
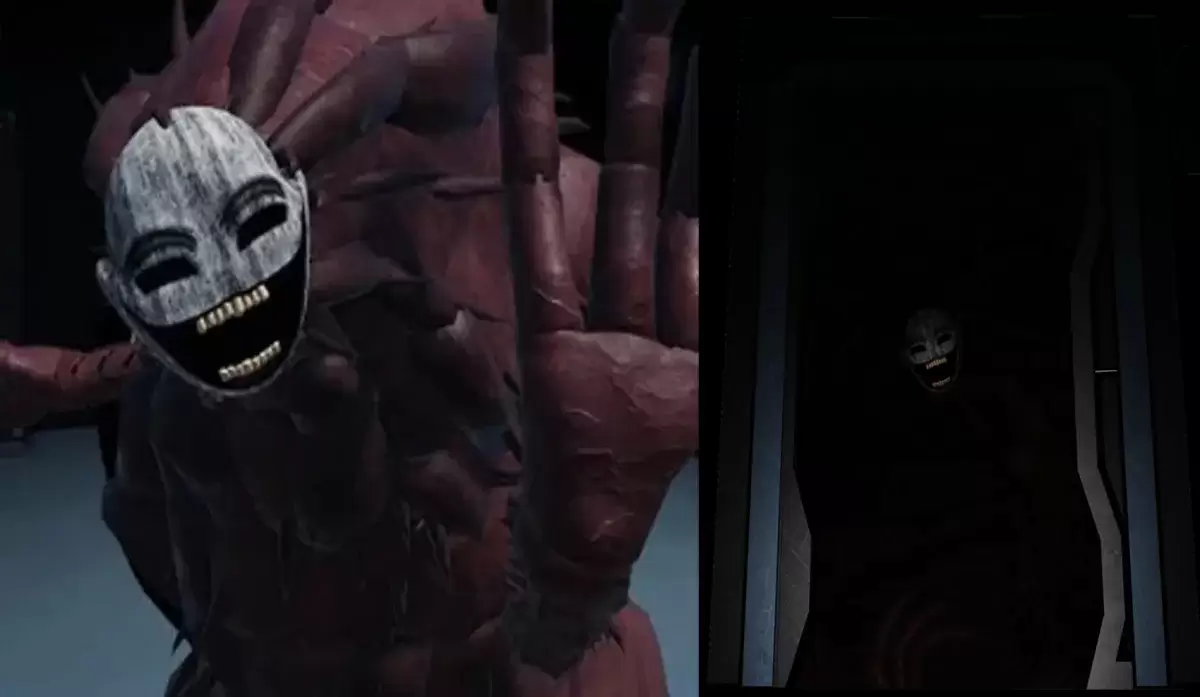 Image by The Escapist
Good People appear in rooms with dead-end doors, one of which is a Fake Door leading to an attack. To avoid this, remember:
- **Fake Door Cues**: Approach doors closely without opening them to detect breathing, growling, sparks, or scanlines on the navi-path sign, indicating Good People's presence.
- **Dark Rooms**: In dark settings, Fake doors' navi-path screens stay lit, while real doors remain dark.
- **HQ Message**: If HQ directs you to a path without mentioning incorrect ones, be vigilant for Fake doors.
Eyefestation
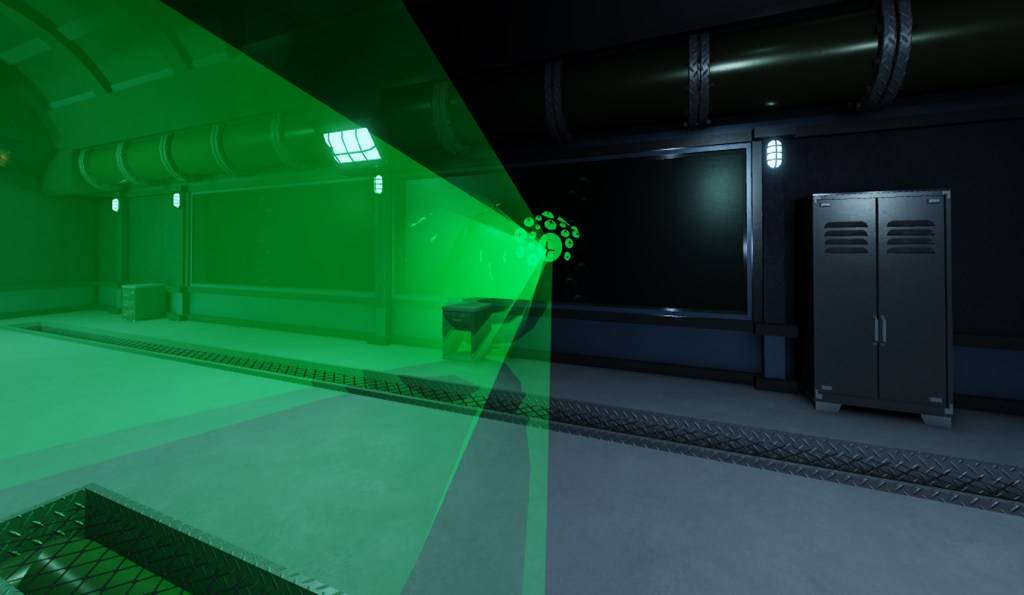 Image by The Escapist
This shark-like creature appears in rooms with ocean views. Avoid looking out the window, as eye contact drains your HP. Simply exit the room without gazing outside to make it despawn.
Squiddles
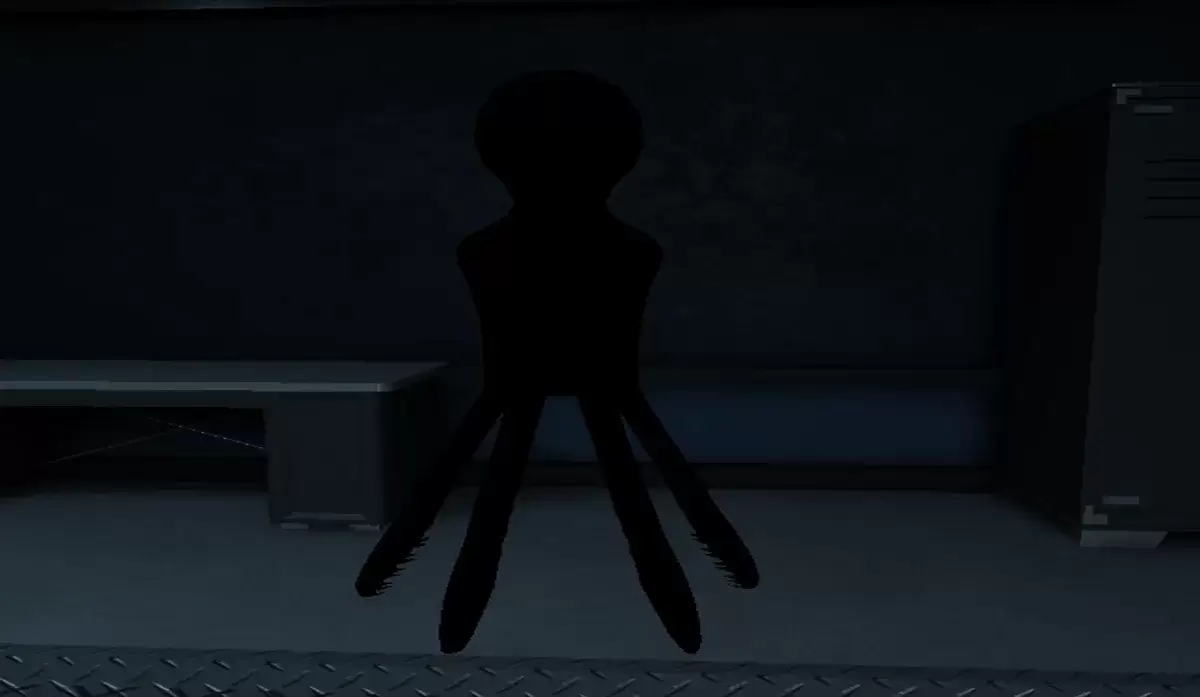 Image by The Escapist
Dealing with Squiddles is straightforward: turn off your light upon spotting them and keep a safe distance. They appear in dark rooms or those darkened by other monsters. Navigate past them with your light off and a wide berth to survive.
Locker Void-Mass
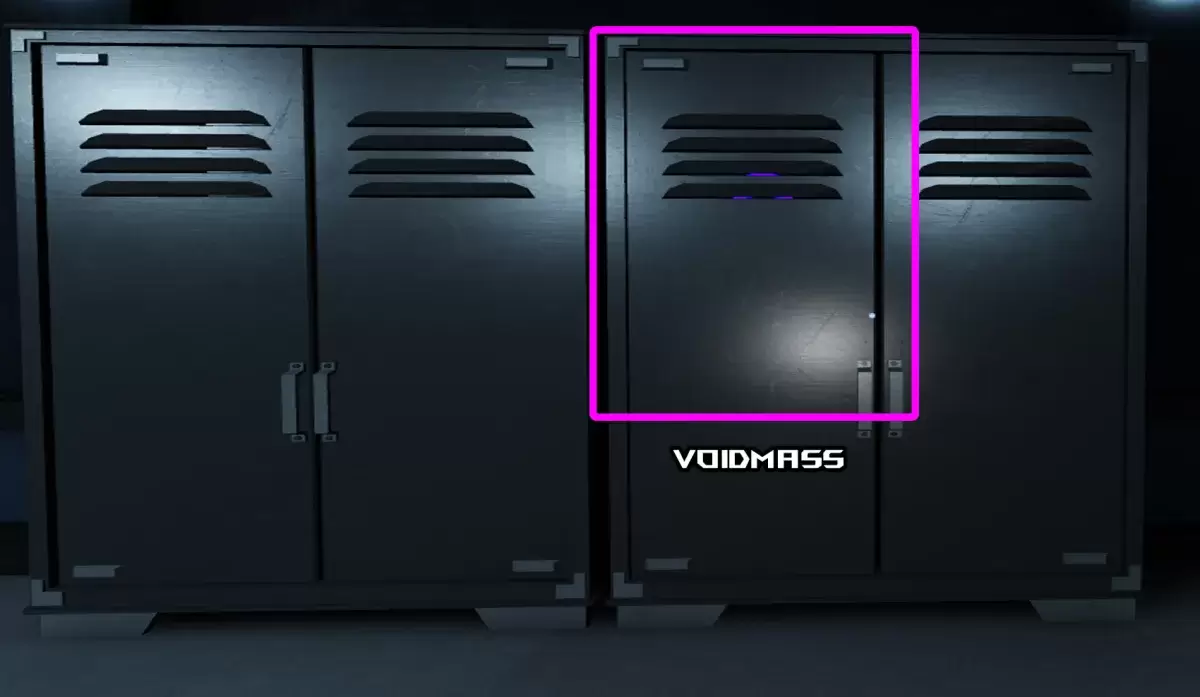 Image by The Escapist
These slimes randomly appear in lockers. Entering a locker with them inside causes damage and traps you. Check for purple slime before entering. If trapped, you'll take continuous damage until you die or are rescued by another player.
Wall Dweller
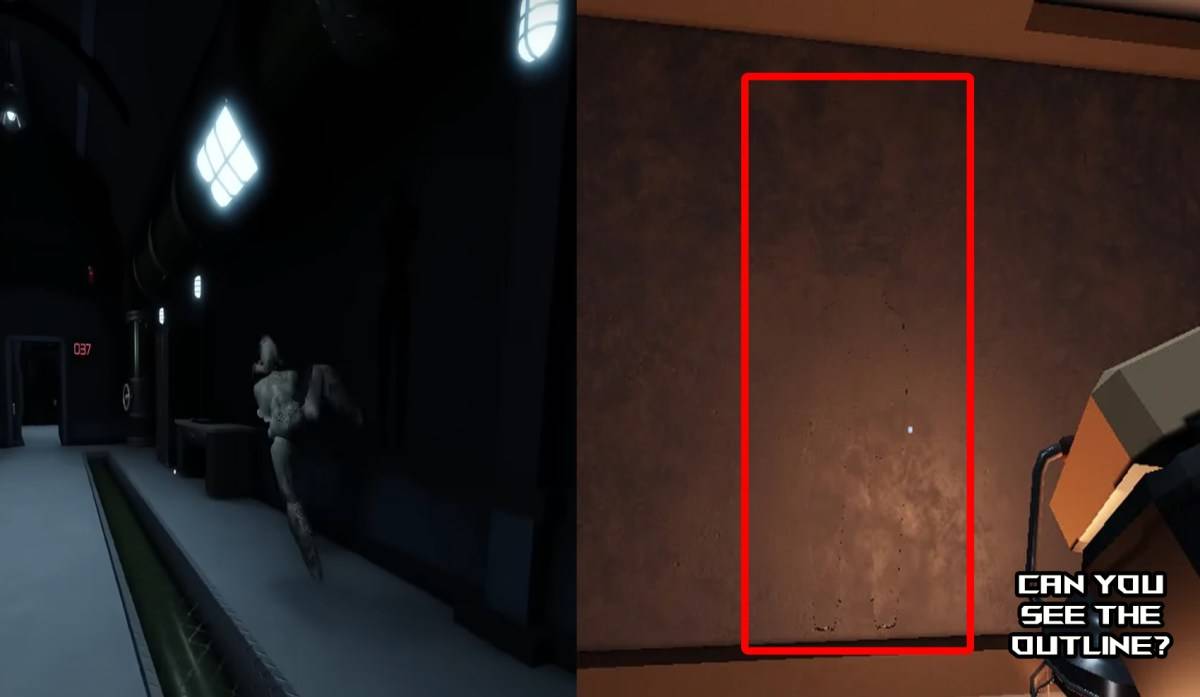 Image by The Escapist
Wall Dwellers emerge from walls to chase and instantly kill you if they catch up. Listen for their unique footsteps. Turning around makes them retreat. If one attacks a teammate, you can approach and attack it. Baiting them out and having another player kill them is the best strategy. If a roaming Node like The Angler encounters a Wall Dweller, it will kill it, leaving a meat chunk for health regeneration. However, meat from player-killed Wall Dwellers is defective and won't heal.
Redeemer and Hanger
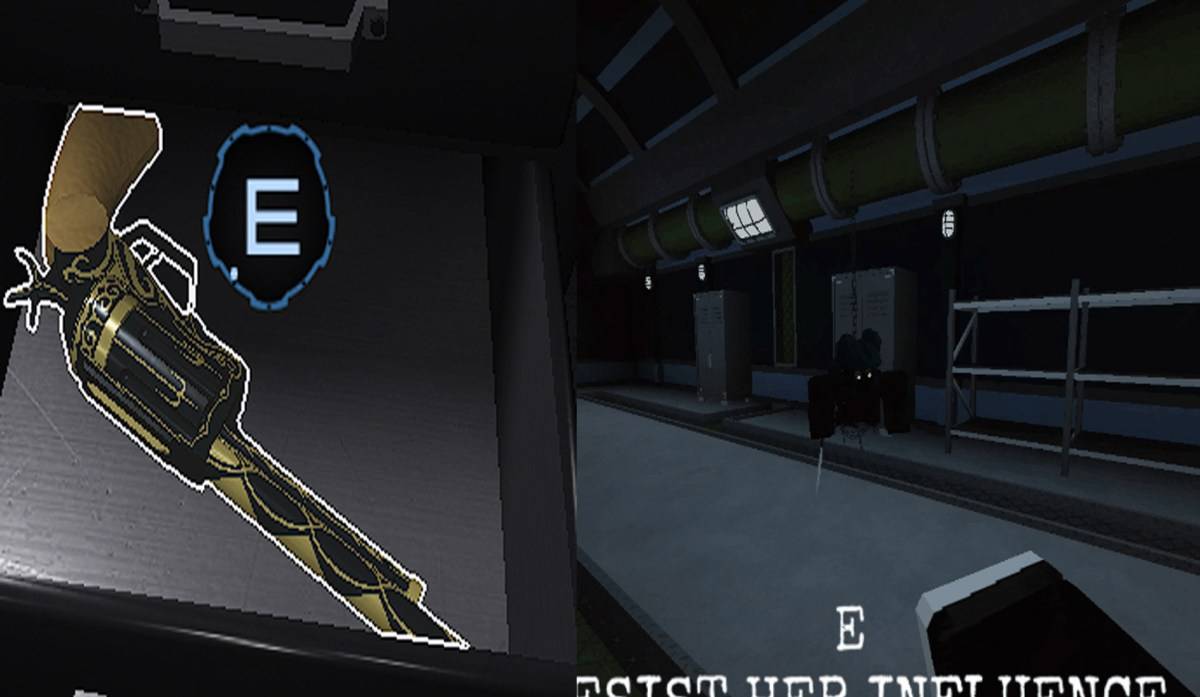 Image by The Escapist
Finding the Redeemer revolver triggers a minigame with the Hanger monster appearing behind you. Mash the E (Interact) button to resist its influence. Success lets you shoot the Hanger and survive; failure results in self-harm or being stabbed for 20 damage per hit.
Candlebearers & Candlebrutes
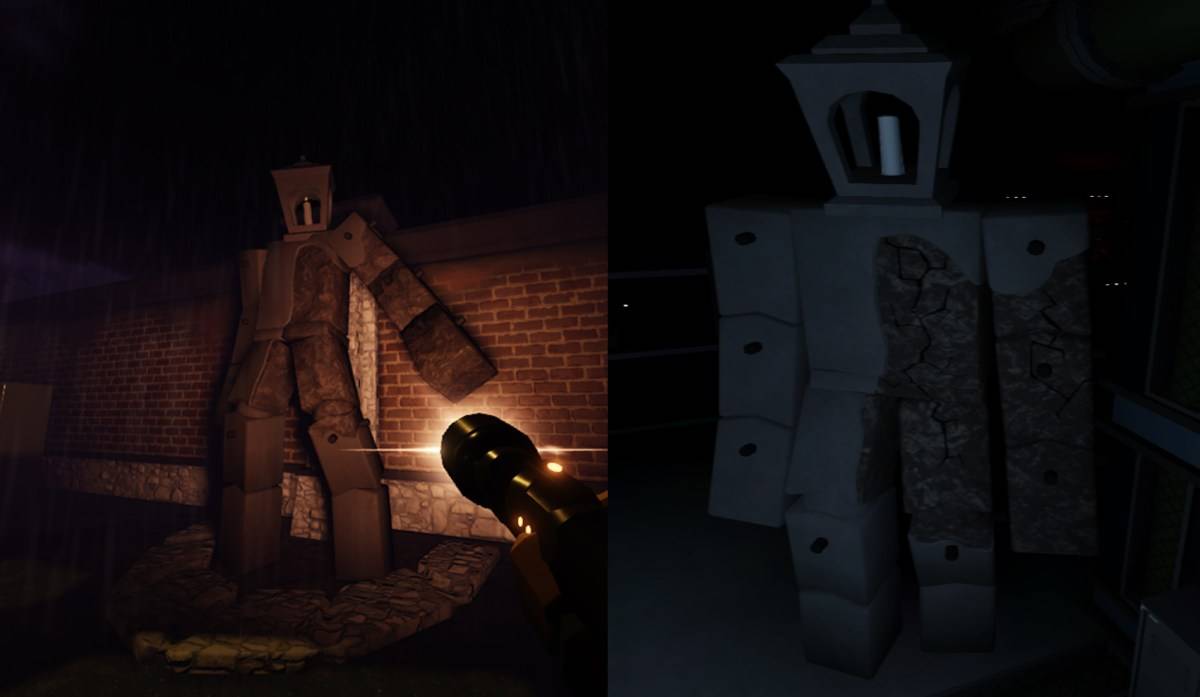 Image by The Escapist
Candlebearers are stunned by light but become enraged if exposed for over 3 seconds, chasing you. They deal low damage, so use light sporadically to slow them down. Candlebrutes, a tougher variant, are only slowed by light, not stunned, and are faster. Emergency lights don't affect them, and they enrage after 5 seconds of light exposure.
The Angler
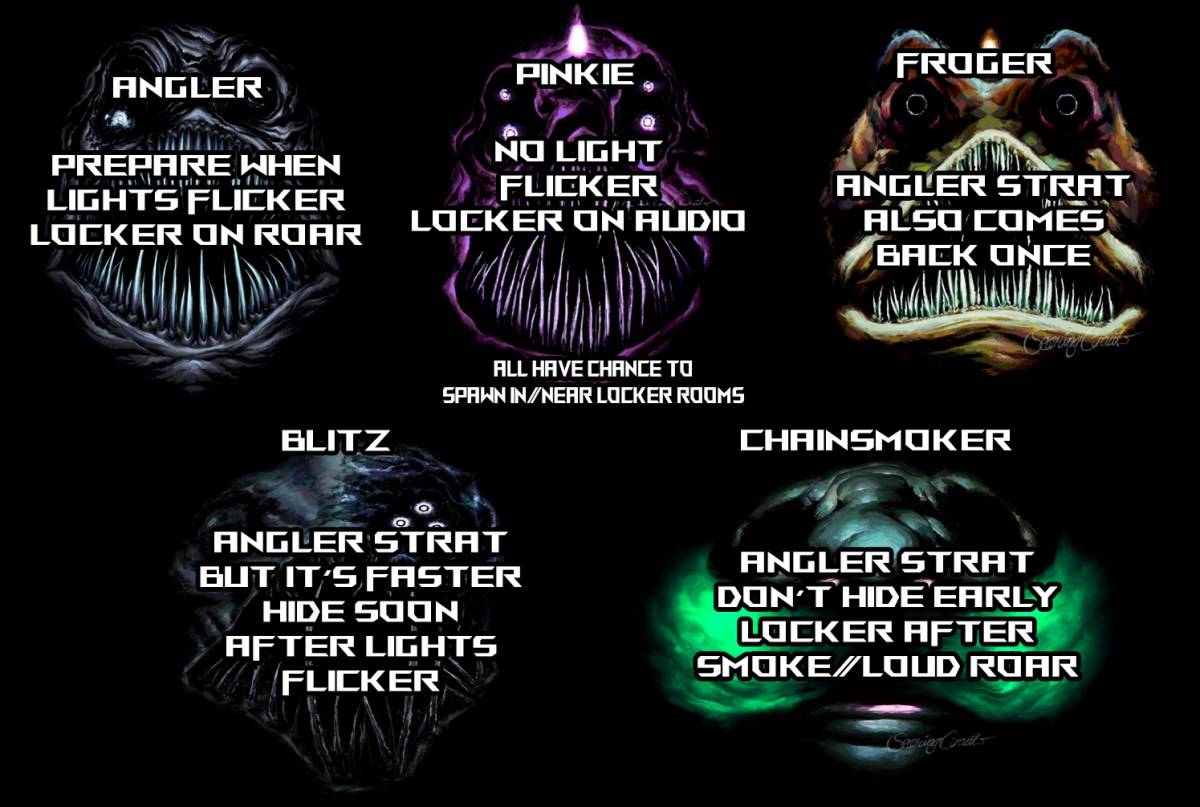 Image by The Escapist
The Angler and its variants are common in *Pressure*. Flickering lights signal its arrival; hide in a locker or submerge your head in water. It only spawns in rooms with lockers and will insta-kill any player in its line of sight if not hidden.
Pinkie
Similar to The Angler, Pinkie doesn't flicker lights but makes a screeching sound as she enters. Hide in a locker when you hear it, as she only spawns in rooms with hiding spots.
Froger
Froger mirrors The Angler with flickering lights and a screech. Hide in a locker upon these cues. Unlike others, Froger rebounds back along the path, so be ready to hide again.
Chainsmoker
Chainsmoker signals its arrival with flickering lights and rattling chains. It emits green smoke before entering a room, which can force you out of a locker. Hide when your screen shakes to avoid this. Chainsmoker is one of the slower monsters.
Blitz
Blitz is the fastest variant of the Node monsters. It screeches as it approaches and roars loudly before entering a room, signaling the best time to hide. Be mindful of its speed.
Bottomfeeder
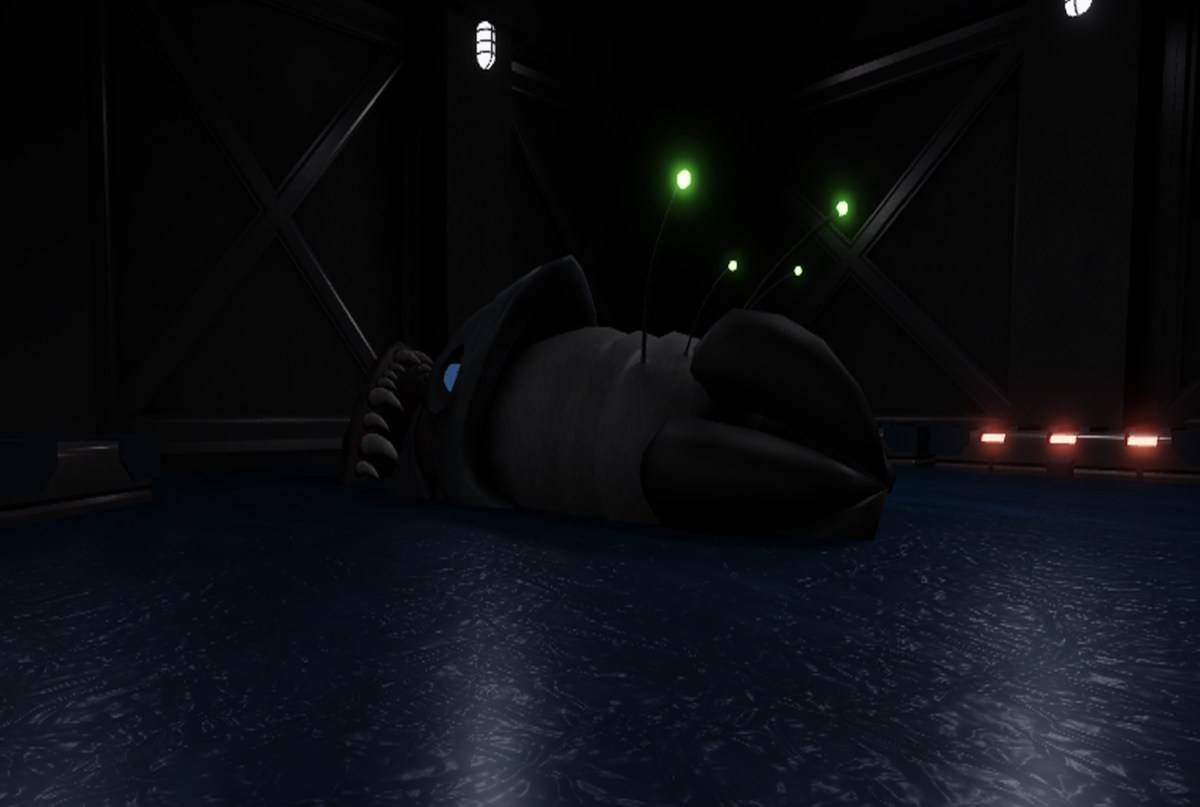 Image by The Escapist
Found in The Dredge area, Bottomfeeder attacks players in water. Use dry surfaces to evade it. If caught, engage in a mini-game mashing Q and E (or mobile buttons) to escape, which drains your health. Winning kicks the monster away, giving you time to reach dry land.
The DiVine
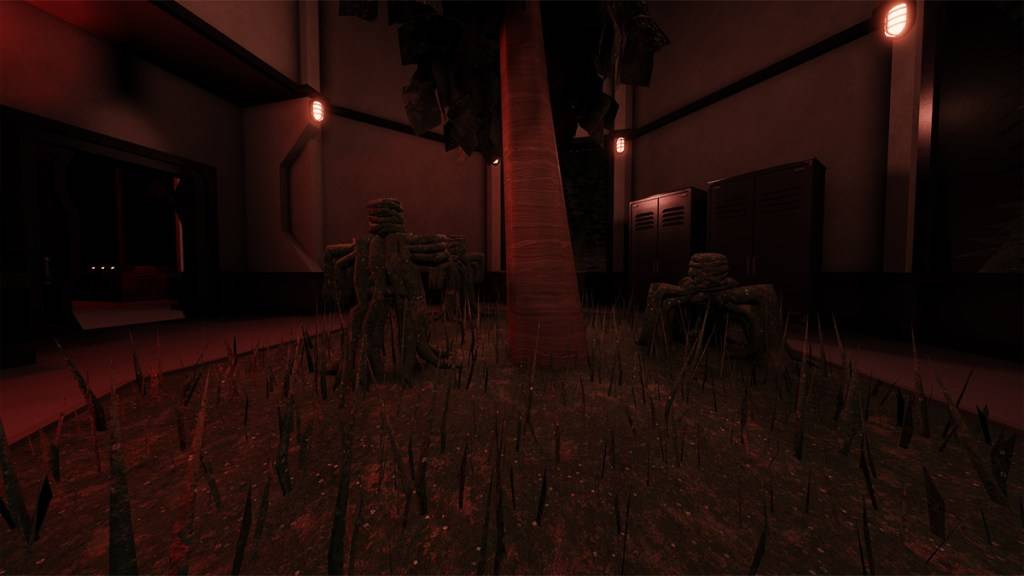 Image by The Escapist
These tree-like monsters in Oxygen Gardens are harmless if you avoid grass patches. Stepping on grass activates them, causing them to chase and deal 75 damage if they catch you. They can combine with other monsters, so avoid grass and other threats simultaneously.
That concludes my guide on all monsters in *Pressure* Roblox and how to survive them. Don't forget to check out our *Pressure* codes for free goodies.
 Latest Articles


 Latest Games